About

Saturday, July 29, 2023

Side Step Fun Fold

 Hello,

Rainy day here, perfect to stay home and stamp.

Today's card is a fun fold....a side step card. 


Simple to make. 


For this card I used the Masterfully Made Designer Series Paper. The colours in this set of papers are beautiful, from bold to soft.

Here are the measurements. 


Add your sentiment as desired. I hope you give this card a try. 

Thanks for stopping by. Until next time....


Paula


Friday, July 21, 2023

A Few Cards

 Hello,

Just wanting to share a few cards I’ve made over the past few days. 

First up, a book  fold card. An easy fun fold and a good way to use up scraps of dsp.


Next, another fun fold. A tri-fold card. 

For this card I used Peony Garden  DSP.


Another version using Countryside Inn DSP.


The measurements for this tri-fold are: 
Base: 5 1/2 x 11 scored at 1 3/4, 5 1/2 and 9 3/4. The belly and measures 1 1/4 x 9 1/2. 

I hope you give these fun-folds a try. 
Thanks for stopping by. Until next time….

Paula


Sunday, July 9, 2023

Matchbox Fun Fold

 Hello,

Today I have a cute fun fold for any occasion. It's called a matchbox fun fold. 


The bottom flap of the card folds up and tucks under the rim at the top. How cute is that?
And inside... surprise! its a pop up.

Wouldn't this fun fold be cute for a children's party invitation? Or a BBQ invitation? Even a birthday card. The possibilities are endless!

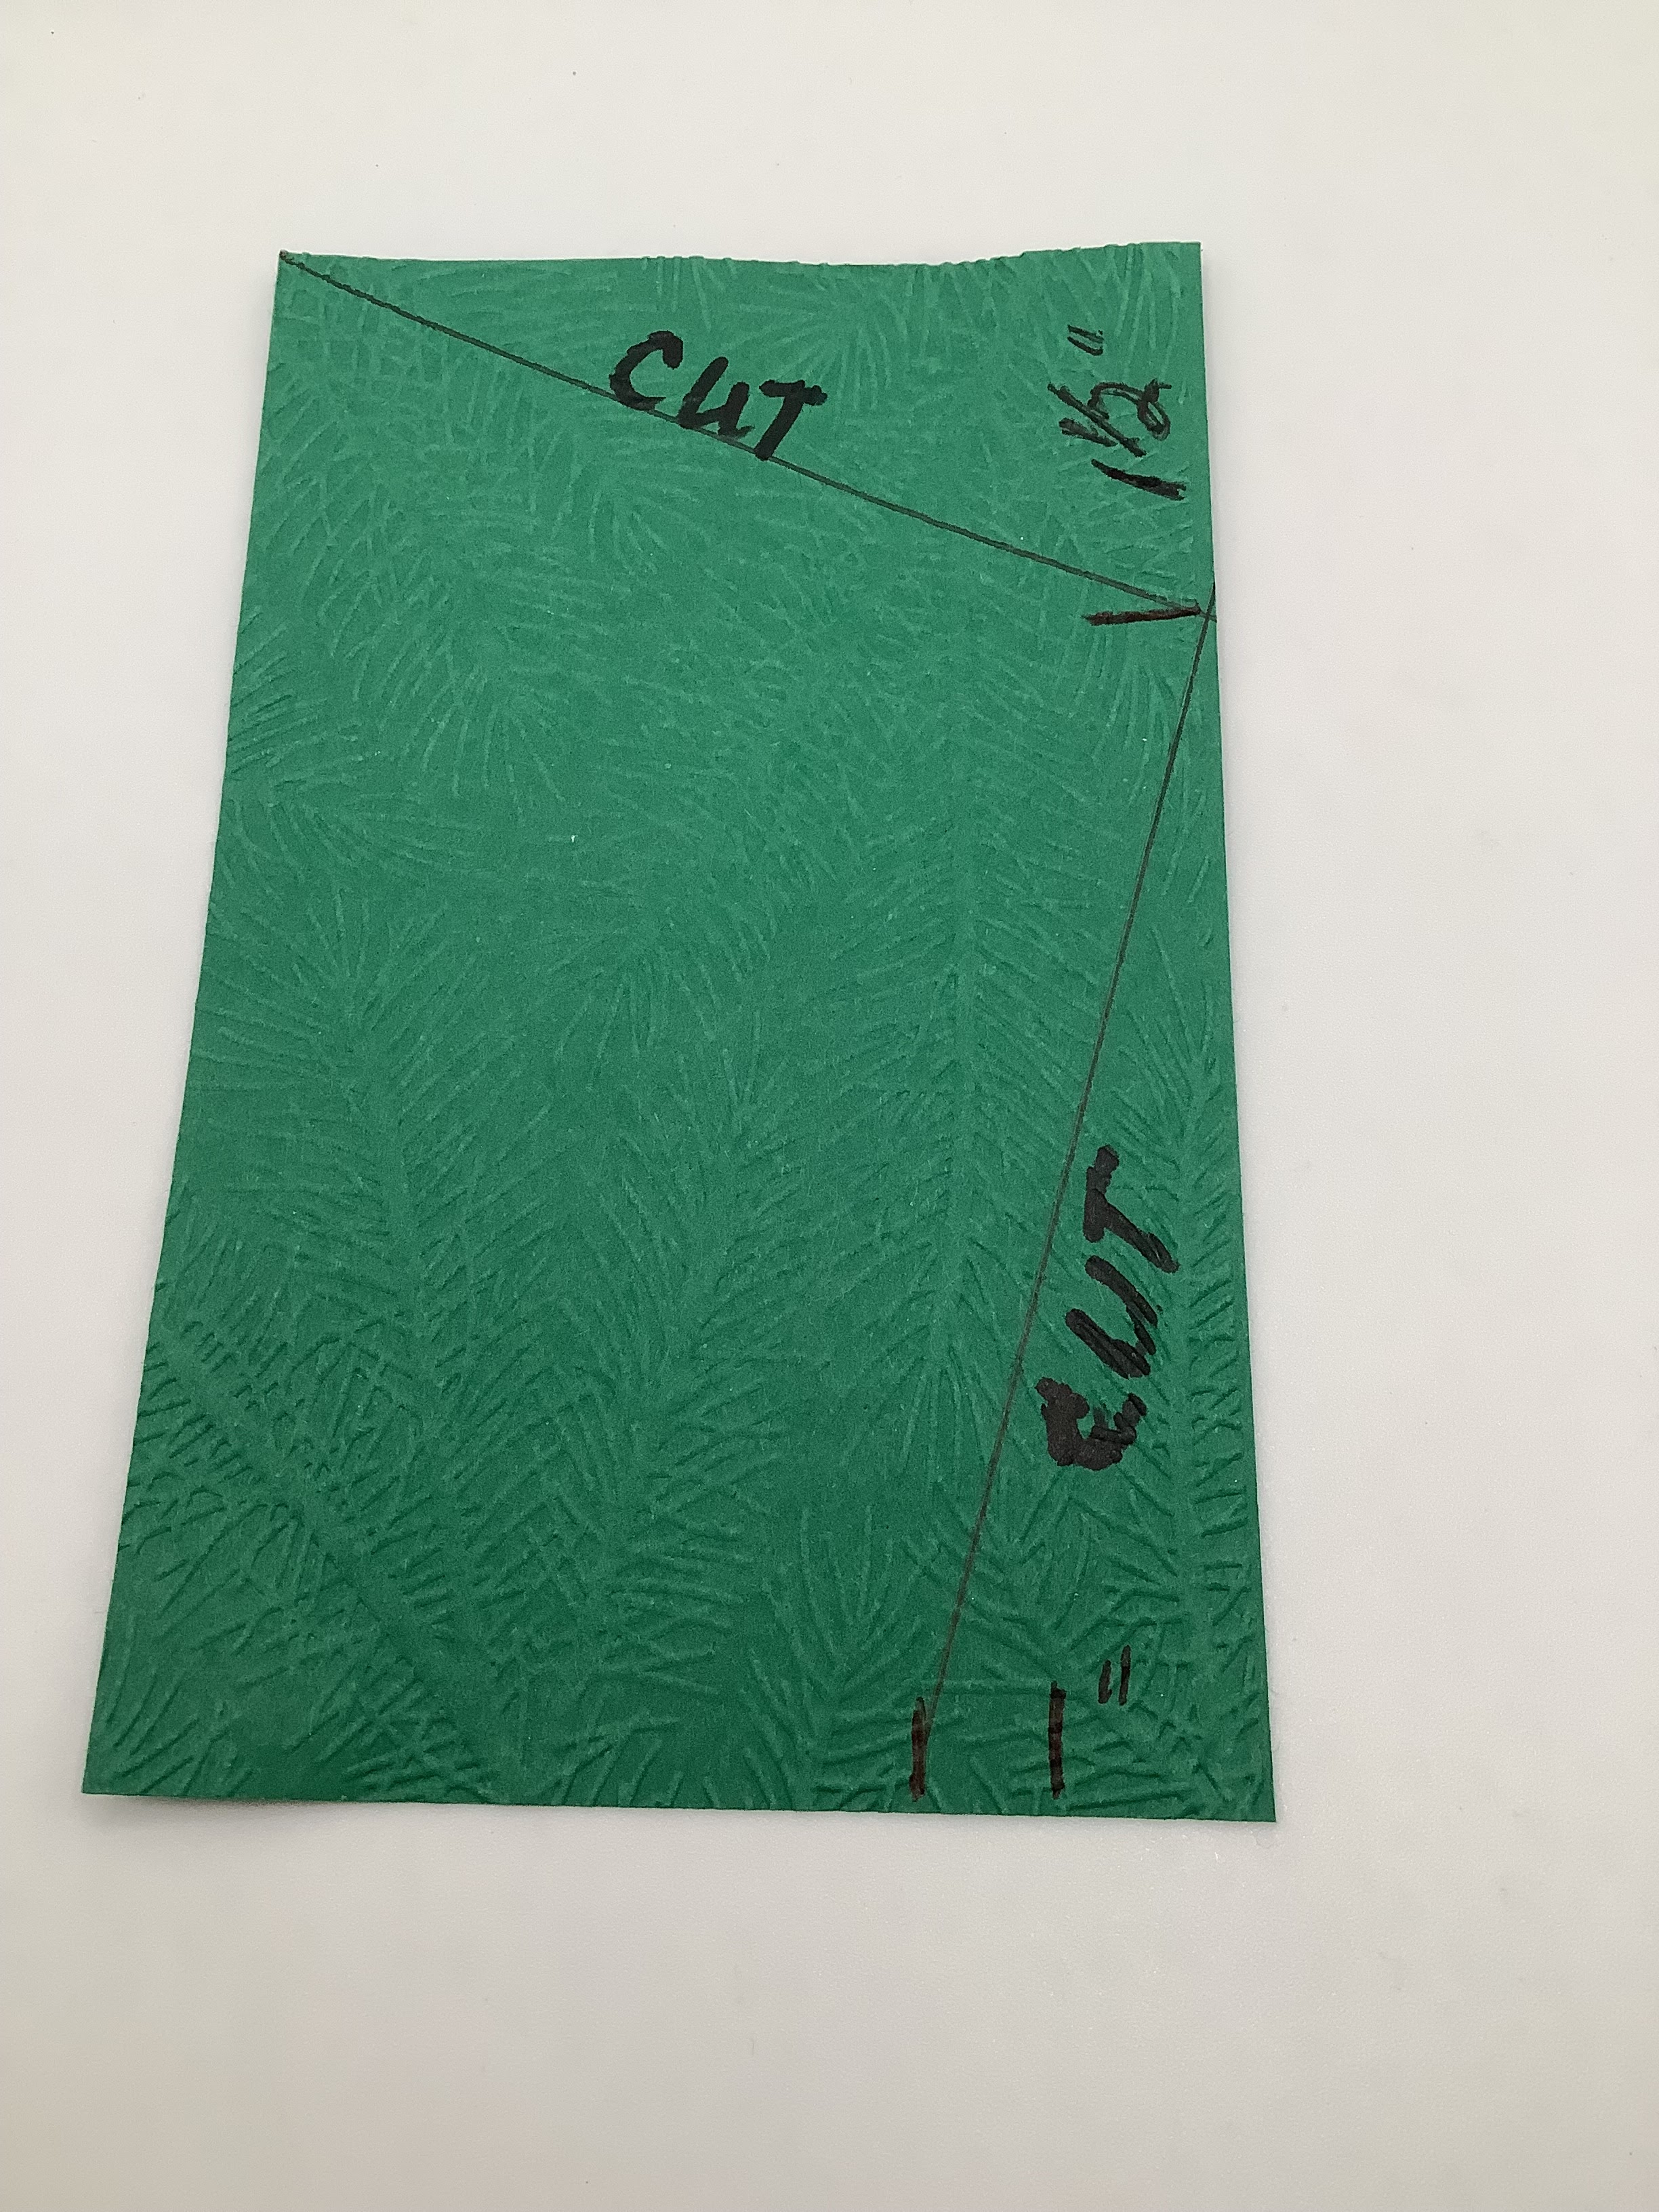
Here's how it goes together. All measurements are in inches. Cut your pieces as per the photo below. You may need an extra piece of scrap paper, the size depends on the image inside, to attach your image to the pop up mechanism.

For the base, the longest scored piece is the back and the shortest scored piece is the front flap. Burnish all score lines well. Adhere the dsp to the front of the card and to the front part of the top tab. Adhere the base under the top tab piece. 

For the pop up insert, cut a piece of card stock measuring 9 1/4 x 3 1/2, scoring at 5. Fold and burnish. With the folded part of the insert at the top of your trimmer, cut 3/4" down at  the 1 1/2" and 2" mark. That's the pop up mechanism. 
(excuse the crude drawing)

If you want to do any stamping on the insert, do it before you adhere to the base. Match the score lines of the insert to the base and adhere both the top and bottom, ensuring the longest part is at the top. Then adhere the image to the pop up mechanism. If the image is large, adhere it to a piece of card stock for stability, then to the pop up mechanism. 

Tuck the bottom flap under the top rim. Tie a ribbon around the top rim to hold the card closed. Alternatively, you can add a small magnet or velcro fastener to hold the card closed. 

I hope the instructions are clear, please reach out if you require further clarification. (Sorry, I'm not the best teacher 😟). 

I hope you give this card a try. Until next time....

Paula


Tuesday, July 4, 2023

Sweet Ice Cream

 Hello,

It's going to be stinkin' hot here for the next few days. A good time to stay indoors and craft where it's cool. 

What better way to cope with the heat, other than AC of course, than to treat ourselves with some nice cold ice cream. What's your favourite flavor? I love butterscotch.

The Sweet Ice Cream suite is one of those where the DSP does all the work. 

This was an easy fun fold. To make the angle cuts, measure down from the top right corner  1 1/2" and make a tick mark. Then measure 1" in  from the bottom right corner. Cut from the top left to the 1 1/2" tick mark then cut from the 1 1/2" tick mark to the 1" tick mark at the bottom. To cut the DSP, measure 1/4" smaller than the card stock then use the same method to cut the angles on the DSP. 

Like so...
Then decorate as required.

For this card...
I used the same DSP pack, but cut 2 1/8" off the front of the card, then attached a panel which could be any size  or any shape you like. I can see this DSP used for any occasion...birthday....party invitations, even get well.

I hope you give the designs a try.

Thanks for stopping by. Until next time....

Paula