About

Friday, November 26, 2021

Happy Holly-Days

 Hello,

I’m baaack! I’ve been MIA for a bit looking after some personal things plus I kind of lost my mojo.

For today’s card I’ve used the Happy Holly-Days stamp set along with a few other elements. I like mixing and matching stamp sets and dies for an altogether different feel for a card. 


Until next time….

Paula

Friday, November 19, 2021

Ever Eden Joy and Love

Hello,

This card took on many changes while making it. I had a design in mind but the card turned out totally different. Does that ever happen to you? Sometimes I think I overthink a design. Too many ideas floating around in my brain. 

Today's card uses the Ever Eden Specialty DSP. I love the gold elements in the paper. The image is from the Mistletoe Season stamp set. 


I coloured the bow with a gold gel pen. I didn't care for the way it looked so I coloured over it with a Bumble Bee Stampin' Write marker and added some Wink of Stella for some shine.

I've just about finished my Christmas cards. Now on to shopping. Yikes, only 36 days until Christmas!!!

Until next time....
Paula


Sunday, November 14, 2021

Poinsettia Petals

 Hello,

My friends and I always get together for a holiday luncheon. Last year we didn't because of  Covid but this year we have set a date. I made some pins for my friends, you can see them here. I wanted a pin for myself but in pink. I couldn't find any pink felt so I made one out of paper.  But not just any paper. I use the White Velvet paper from Stampin' Up.


I coloured the velvet paper with Blushing Bride using blending brushes. Blending brushes let you add colour in stages, whether light or dark depending on the amount of ink used. 

For this flower I cut out 2 large, one medium and 2 small poinsettias from the Pointsettia Petals dies. I stacked them off centre from each other adhering the petals with hot glue. Once I added leaves and the snowflake behind the flower,  I hot glued it to a piece of cardboard for stability. The pin is hot glued to the cardboard. The pins can be purchased at craft stores like Michael's.

I love the way this one turned out. 

Until next time....

Paula


Friday, November 12, 2021

Heart and Home

 Hello,

There is a new bundle coming out in the January-June 2021-2022 mini Catalogue. It's called Heart and Home. I used the bundle along with the DSP for today's card. Thank you to Wendy Cranford at https://www.luvinstampin.com/blog  for the inspiration. I modified the card a bit, adhering the twisty portion to a regular card base so the card would stand up. This makes the card a bit bulkier so mind the postage. 


Check out Wendy's blog for the tutorial. 

Until next time....

Paula


Monday, November 8, 2021

Felt Flowers

 Hello,

Did you know many of the Stampin Up dies will cut thin felt or fabric? For this project I used the Poinsettia Petals dies to cut felt which I made into brooches for Christmas. I adhered the petals with a hot glue gun. Thank goodness for my trusty silicone craft sheet. When I use my glue gun, glue tends to get everywhere.🤣


Any 3D project would be fun to make with the array of dies from Stampin UP. 

Here are some ideas:

Additions to place cards for any dinner party.

Pin the penguin (Penguin Builder Punch- I have not tested punches) on the iceberg for children's parties. Or possibly stamp a playful image with Stazon ink onto some felt and fussy cut.

Felt ornament decorations (Stitched Snowflake Dies, Christmas Pinecone Dies, Gingerbread Dies) Embellish with beads, gems or jewels.

Appliques on cushions. 

Wreaths (Intricate Leaves Dies, Poinsettia Petals Dies, Butterfly Brilliance Dies)

Give it a whirl.


Until nest time....

Paula


Friday, November 5, 2021

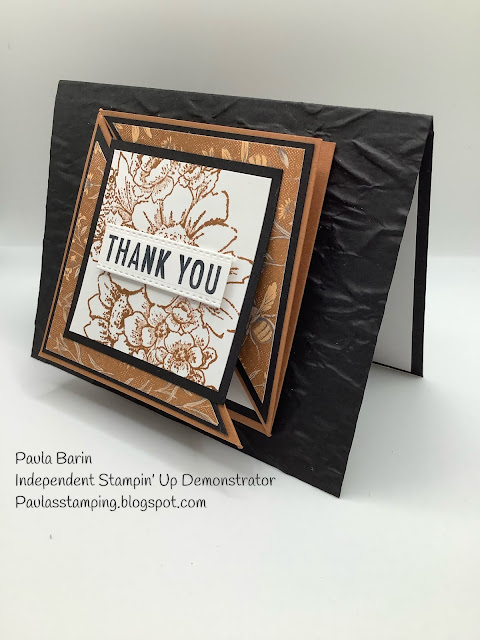
Front Flap Diamond Fold

 Hello,

Here again today with another fun fold card. This fold is called a front flap diamond fold. Very easy to make. 


The recipe:

Base: card stock measuring 4 1/4"x 11" scored at 2 1/8" and 5 1/2" on the 11" side. 

Rotate so the 4 1/4" side is at the top of your trimmer and make a tick mark at 2 1/8". Flip it around and do the same to the opposite side.

Fold and burnish the score lines. Use a pencil to mark at 2 1/8″ at each end and cut on the diagonal to the score line. 

 Template reference:


Fold the card stock like this:


Now to decorate:

For the card front, cut a coordinating color of card stock 3 1/8″ x 4 1/8″- I used  Soft Succulent. For the card front, also cut some  DSP 2 7/8″ x 3 7/8″ – I used Painted Christmas. Adhere the DSP to the coordinating card stock and adhere to the front of the card.

Cut a Basic White layer measuring 3 1/8" x 4 1/8" for the sentiment. Adhere to the inside of the card. I used the same layering as the front of the card for the inside left panel but a piece of Basic White could also be used for a personal note.

For the diamond flip piece, cut the coordinating card stock 2 7/8″ x 2 7/8″ Adhere the square to the triangle to make the diamond shape – be careful to apply glue to only half of the square. Cut a piece of 2 3/4" DSP to adhere to the triangle square.

Use scraps to cut out a sentiment in whatever shape you choose, I used the oval Stitched Shapes. If layering the right side  triangle, cut a piece of coordinating card stock at 2 7/8" and cut on a diagonal. Cut a piece of DSP at 2 3/4" and cut on a diagonal. Adhere together and then on to the card base. 

Decorate with embellishments on the front as desired. This card folds flat and will fit into a regular envelope.


Until next time....


Paula


Thursday, November 4, 2021

Encircled in Friendship

 Hello,

Often I look to challenge myself with card making. Sometimes it's making a fun fold or using Stampin Blends to colour an image or learn a new technique. Today I challenged myself to use a stamp set that I have not inked up yet (and believe me I have many of them🤣). Encircled in Friendship is one of those stamp sets. The sentiments are thoughtful and the font is beautiful. 


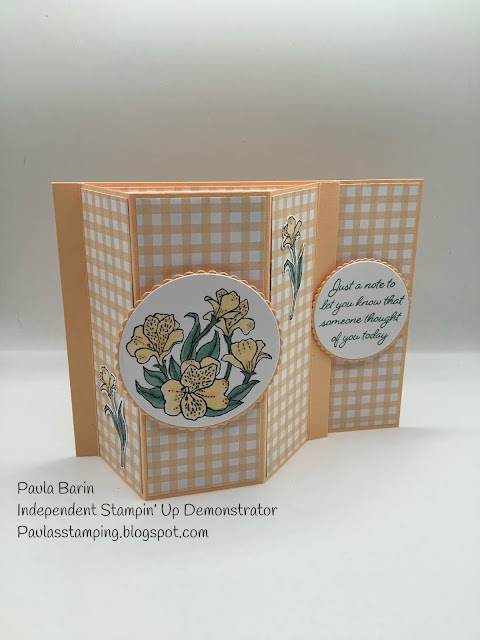
Today's card also happens to be a fun fold called a bay window card. I watched Lisa Curcio's presentation last night on how to make this card. It's very easy and can be made for any occasion. 


You can see why the fun fold is called a bay window. Alternatively, a 'window" can be cut out of the centre panel, insert a window sheet, to reveal an image on the inside. 


The "lip" of the card tucks under the sentiment which is adhered with dimensionals. 


And best of all, it lays flat for mailing

Here are the measurements for the card.

Base: 4 1/4 x 11 scored at 3/8", 1 7/8", 3 5/8", 5 1/8", 5 1/2"

FRONT: • Designer Series Paper: 1 3/8” x 4 1/8”, cut 2
 • Designer Series Paper: 1 5/8” x 4 1/8”, cut 1
 • Scraps to make your greeting and layering using any shape desired to fit the sentiment and image
  • Optional: embellishments 

 INSIDE:
 • Designer Series Paper: 4 1/8” x 5” 
• Basic White: 3” x 3 7/8” 

For instructions on assembling the card, watch Lisa's tutorial HERE and check out her other samples for inspiration.

Until next time....

Paula


Monday, November 1, 2021

Poinsettia Petals

 Can you believe its November already? Where has the time gone?

I was looking through my stash of designer series paper....and by stash I mean hoard.😊 I found the Poinsettia Place where the dies from the suite cut out the images on the paper. Yup, that'll work for this card. 


Check your stash of papers. Coordinate them with new dsp or card stock, incorporate some die cuts, add some embellishments and make them new again.

Until next time....

Paula