About

Sunday, June 25, 2023

An Abundance of Flowers

 Hello,

I love flowers! Most of my stamp sets and dies are floral. I find I'm more creative with flowers as opposed to cutesy or masculine stamp sets. 

One of my current favourite designer series paper is Countryside Inn by Stampin'Up. It's floral (of course) and in beautiful shades of blue.


Aren't the papers gorgeous? And don't forget about the "B" side of the paper. It makes for great masculine cards. 

While there are no floral dies that go with the paper, Stampin'Up has many dies in their products which match nicely.
I chose Pierced Blooms dies. Each petal and leaf has some stitching. The dies are retired.😟
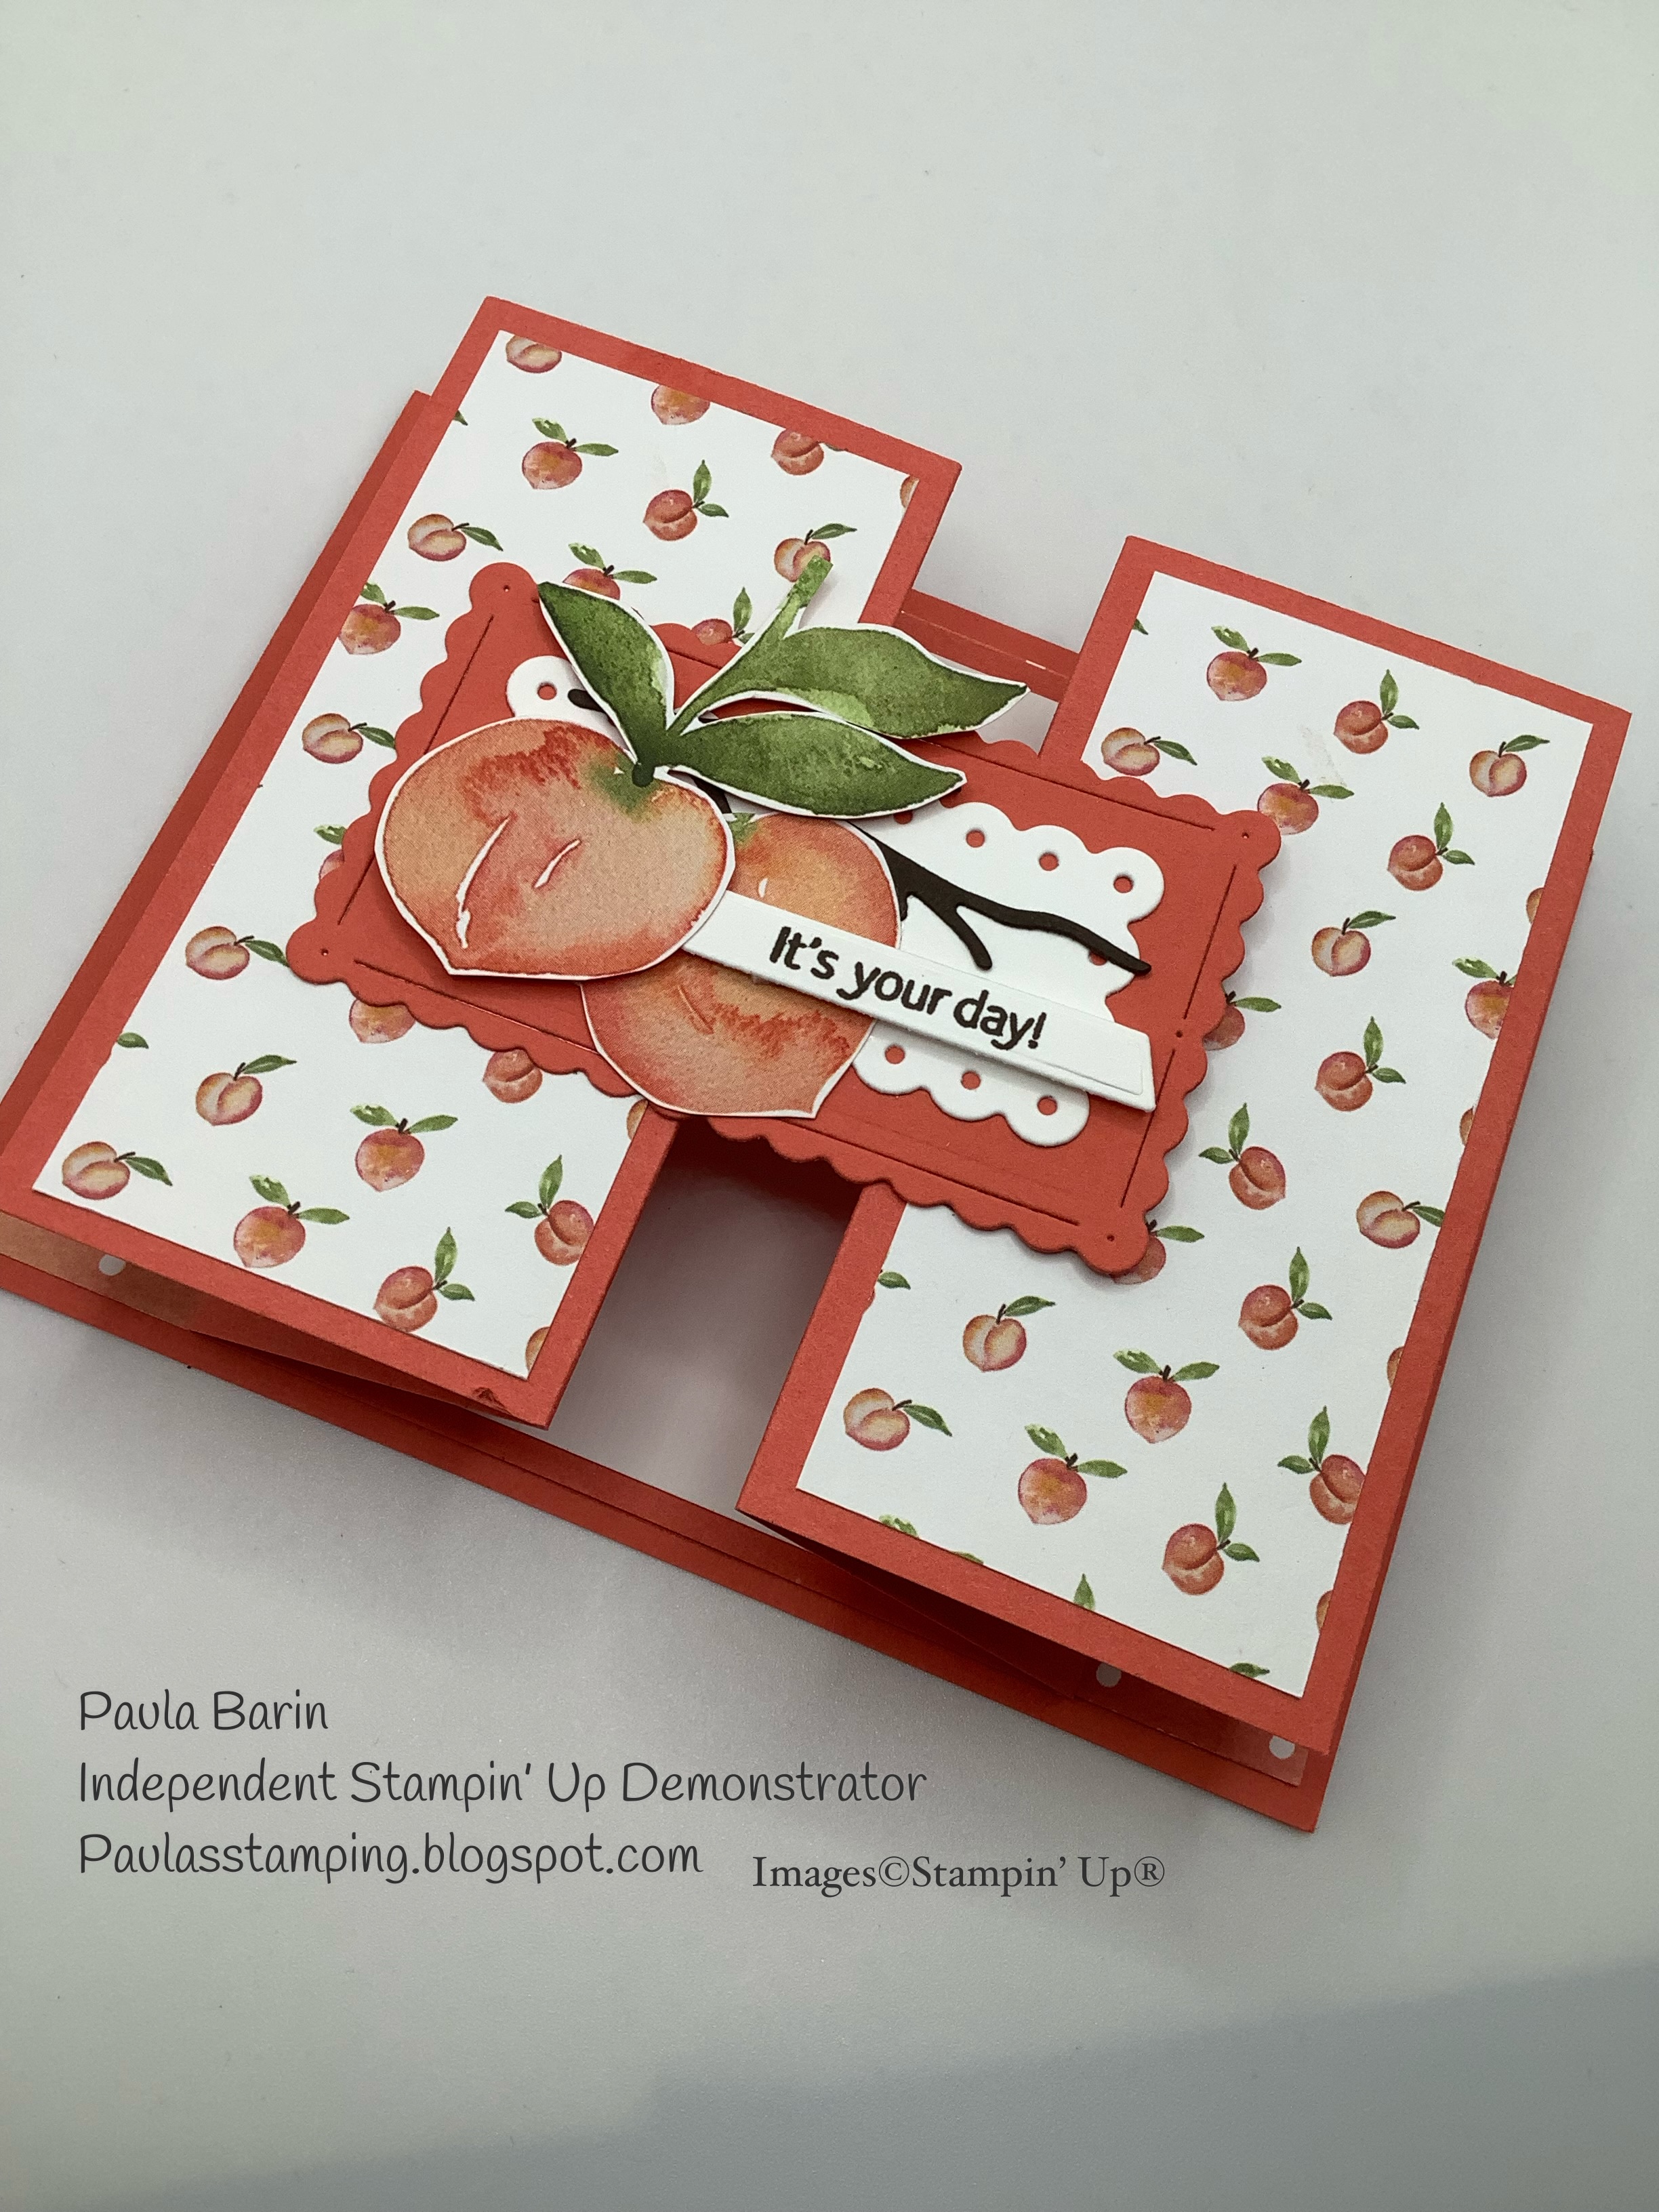

Here is my card...

Cute, right?
I added some scallops from the Color and Contour dies. The birthday sentiment is from the Go To Greetings stamp set which had the most beautiful fonts. 
Now, for mailing purposes, I would have glued the flowers down flat. But for handing the card out or including it with a gift the 3D flowers pack a punch.


Thanks for stopping by. Until next time...

Paula


Tuesday, June 20, 2023

Everything is Peachy

 Hello,

Here's a peachy fun fold today. 


Here's how I made it.
The base measures 4 1/4 x 5 1/2.  The zig zag layer measures 4 x 11 and the top layer measures 3 1/2 x 3 1/2. For my card, any of the dsp layers measure 1/4" smaller.
 Now for the assembly.
  1. Add the coordinating DSP to the layer, this will measure 4 x 5 1/4. Adhere to the base. 
  2. Next, score the 4 x 11 piece of card stock at 2 and 3 3/4, turn 90 degrees and score the same measurements on that end. Fold and burnish the score lines as such, first score line is a mountain fold, second is a valley fold, third is a valley fold and the fourth is a mountain fold. This gives the zig zag fold. 
  3. Now add your dsp layers. Cut 2 pieces measuring 1 3/4 x 3 3/4. Add these to the outer panels of the zig zag fold. 
  4. Cut a piece of Basic White measuring 3 1/4 x 3 3/4 and adhere to the centre panel of the zig zag fold. 
  5. Adhere the zig zag fold to the base, centering it as best you can. It will look like this. (The paper clip is just to hold the flaps down for the photo).


6. For the top panel layer a piece of Basic White for your image/sentiment. Be sure to do any stamping before you attach the top panel to the zig zag fold.

7. Next, add the top panel to the zig zag fold, making sure only the left side of the top panel is attached to the far left fold. Gluing the entire top panel will stop your card from opening. 

Your finished project will look like this.


Please reach out if you have any questions.

Thanks for stopping by. Until next time...

Paula


Tuesday, June 13, 2023

Berry Blessings

 Hello,

Short post today. I am getting ready for my new dishwasher install. Hurray!

In keeping with my berry cards, here is one using the Berry Blessings stamp set.


Gotta scoot. Wish me luck that all the plumbing goes well. 🤞

Thanks for stopping by. Until next time...

Paula


Monday, June 12, 2023

Sweet Strawberry

 It's berry season! Fresh local berries. Yum. Yesterday I bought 6 pints of fresh picked strawberries...I mean they were just picked that day! Can't get any fresher than that. So in light of these beautiful strawberries, I thought I'd make a card using the Sweet Strawberry Suite. 


I love the coordinating designer series paper. The stamp set bundle includes the stamps and a punch which not only punches out the stamped images, it also punches out images on the designer series paper. Lots of options with this suite. Sadly the set is retired now. 


Thank you for stopping by. Until next time...

Paula


Sunday, June 11, 2023

Step Fold Card

 Hello,

Today's card is a step fold. 

For this card I chose Calypso Coral card stock for the base to measure 8" x 5 1/2", scored at 3", 6" and 7". 
The 3" score line will be a mountain fold, the 6" score line a valley fold and the 7" score line a mountain fold. Burnish all score lines. 
For the DSP, I used Awash in Beauty, cut a piece measuring 2 7/8" x 5 3/8" and another piece at 7/8" x 5 3/8". adhere them to the front as shown above.

For the front panel, cut a piece of card stock measuring 3" x 6" and score at 4 1/4". Burnish. Cut a piece of DSP measuring 2 7/8" x 5 7/8" and adhere to the front panel card stock.


Adhere the front panel to the bottom strip of the step then adhere the other end to the top part of the back of the card. There will only be a slim margin to adhere. In the above photo, I added a piece of white card stock to cover the seam. Totally optional. The white card stock measures 2 7/8" x 5 3/8".
You could also add a piece of white card stock to the inside, same measurements for a sentiment or personal greeting.

Next is to decorate the front. Use any shape, sentiment or embellishments. The sentiment for this card is from the Earthen Textures stamp set.

And there you have a step fold card. I hope you give it a try.

Thanks for stopping by. Until next time....


Paula