About

Monday, May 22, 2023

Flap Fold

 Hello,

An easy fun fold for today. It's a flap fold.


Take a piece of card stock measuring 5 1/2" x 8 1/2" and score at 1 1/4" and 4 1/4". Fold the 1 1/4" score line into a mountain fold and the 4 1/4" score line into a valley fold. Burnish.
There is your flap fold. Now to decorate. 

Cut DSP as follows:
2 3/4" x 5 1/4 " for the front
1'"x 5 1/4" for the narrow flap
4" x 5 1/4" for the base
Adhere all the pieces.

Also cut out of white card stock, a piece measuring 2 3/4" x 5 1/4" for the inside for a sentiment. Alternatively, a piece of DSP can be adhered to the inside instead of white card stock and then add a piece of card stock to the back of the card measuring 4" x 5 1/4". It depends on how much space is required for a personal note.

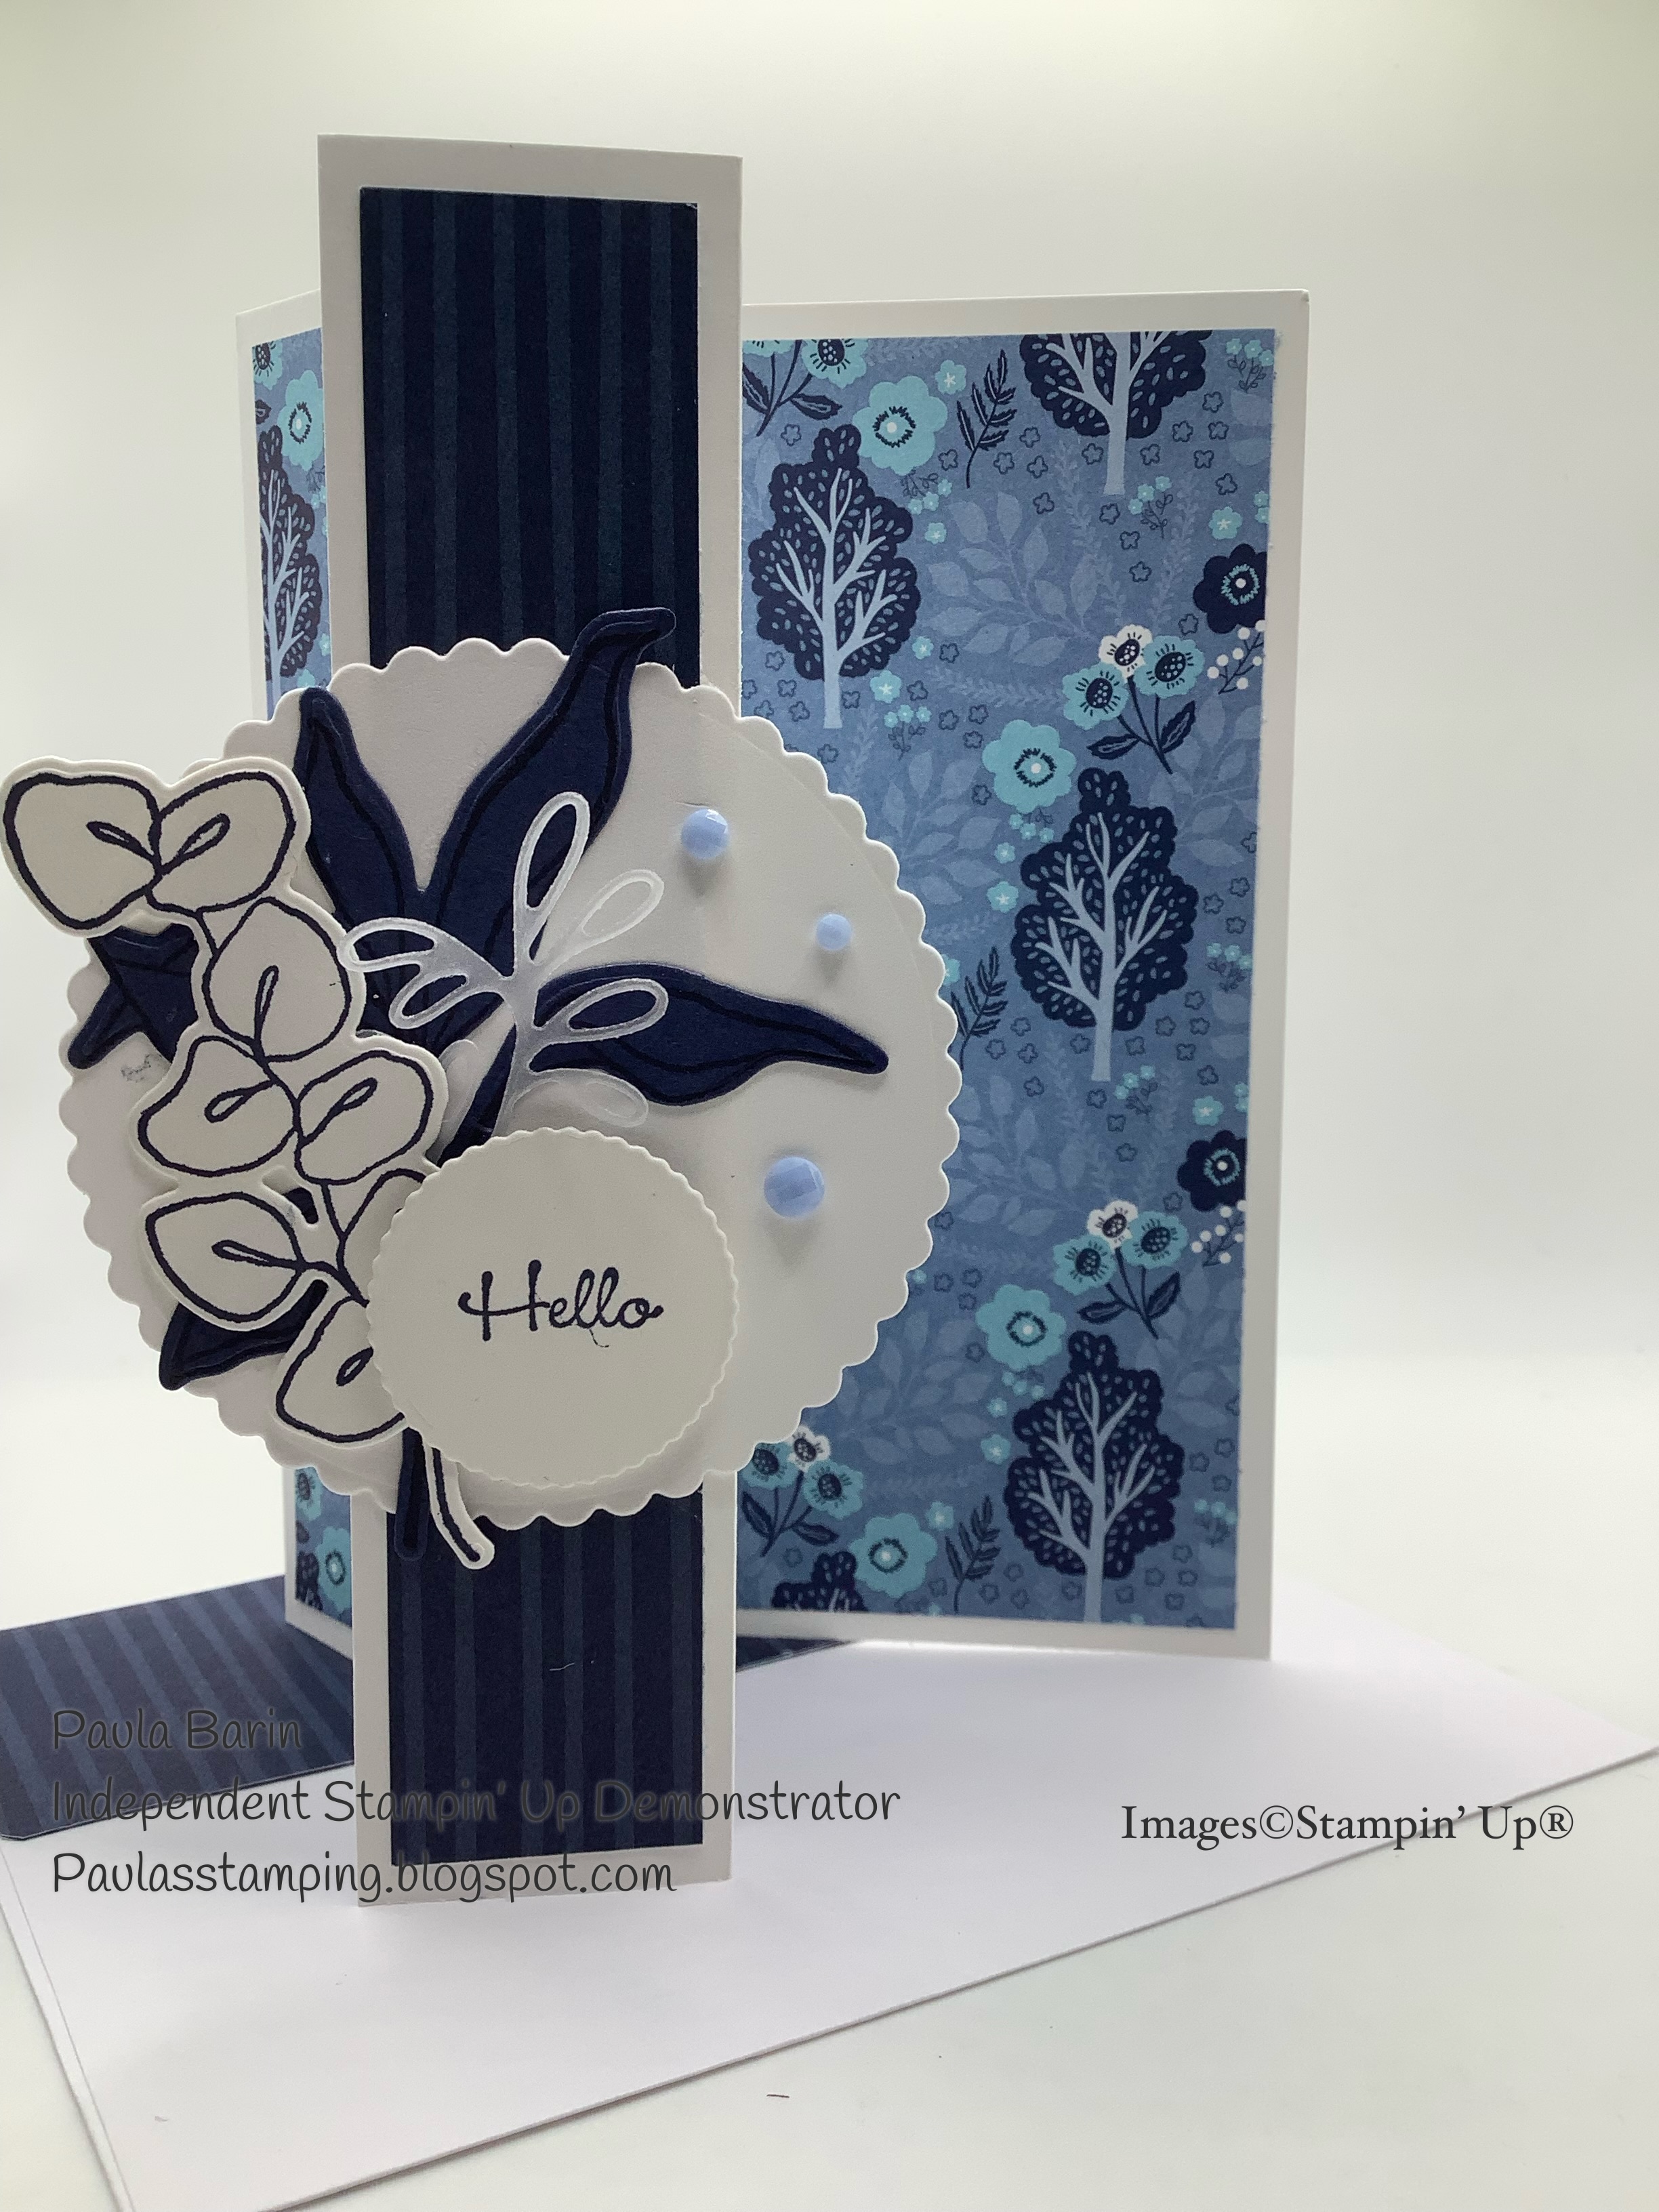
For the front focal point, I opted to cut a circle and adhere some foliage from the Splendid Thoughts bundle. Adhere to the narrow flap, centering it on the front. Be sure to add glue to just a small part of the narrow strip when you add your focal point or the card will not open. (Ask me how I know 😕, you only make that mistake once). You can cut any shape to be your focal point.


The Designer Series Paper is called Countryside Inn, item # 161467. I love all the shades of blue...Balmy Blue, Boho Blue, Misty Moonlight and Night of Navy.


There you have it!
Thanks for stopping by. Until next time...

Paula


Wednesday, May 17, 2023

Countryside Inn

 I'm baaack!

Hello,

It's been a challenging week, I lost my creativity. It could have been because my mind was occupied with ideas for a kitchen reno. Anyhoo, I've managed to make a card today. It's a fun fold. Of course it is 😄. I love making fun folds.


The new Countryside Inn DSP is so pretty with the different shades of blue. 


You can see the front panel is a Z fold. Very easy to make. The panel is then attached to the card base. 


There is lots of room to stamp a sentiment or write a personal note.

Here's how to make it. 
Base: 4 1/4" x 11", scored at 5 1/2"
Front Panel: 4" x 9 3/4", scored at 2 1/4" and 4 1/2". The 2 1/4" score line will be a mountain fold while the 4 /2" score line will be a valley fold. That creates the "Z".

DSP for the panel back: 3 3/4" x 5". Adhere to the panel back
DSP for the panel folds: 2"x3 3/4", cut 2. Adhere to the small sections on the panel.

Adhere the panel to the card base. For the image or sentiment pieces, cut 2 to measure 2 1/4" x 4". Adhere the front piece to the bottom section of the panel ensuring only the bottom third is glued. Adhere the second piece to the back panel section ensuring it matches up with the front piece. Decorate as desired with embellishments. 

Supplies used for my card:
Boho Blue and Night of Navy cardstock
Countryside Inn DSP
Friendly Hello and Circle of Sayings stamp sets.

I hope you give this fun fold a try. Thanks for stopping by. Until next time....

Paula


Tuesday, May 2, 2023

Floral Z Fold

 Hello,

Today I've got a z fold for you. Very easy to make. For this card I used Petal Pink card stock and Tea Boutique DSP.


Instructions:
Card Base: 5 1/2" x 8 1/2" scored at 2 1/8" and 4 1/4"
DSP for the first two panels: 2" x 5 3/8" (cut 2)
DSP for the inside panel: 4 1/8" x 5 3/8" 

Band: 8 1/2" scored at 2 1/8" and 4 1/4"
DSP for band: 4 1/8" x 1 1/2" and 2" x 1 1/2" (cut 2)

Front panel: 3" x 4"
Layer: 2 7/8" x 3 7/8"

Inside layer for sentiment: 2 7/8" x 3 7/8"

Scraps of card stock for embellishments

Assembly:
Fold and burnish the score lines on the base. The first score line will be a mountain fold while the second score line will be a valley fold. Adhere the dsp to all the panels on the base. Adhere the inside layer for the sentiment to the back panel making sure it will be hidden behind the front layer, centering it on the back panel. Next adhere the band, ensuring only the last tab and half of the first tab are glued. I close the card and then adhere the band, making sure the card will open and close freely. Next add the front panel to the card. Stamp the layer then add it to the front with embellishments of your choice. 


There you have it. Thanks for stopping by. Until next time....

Paula