About

Sunday, December 8, 2024

Inspiration

 Hello,

Inspiration for creativity can come from anywhere. 

For these cards I was inspired by recent purchases. The first card, a partridge in a wreath was inspired by some partridge ornaments I purchased at a Christmas bazaar this weekend. 


This second card was inspired by a clip I saw on IG where the maker used napkins as a background. This napkin was recently purchased at a favourite store. 


So, if you get stuck for ideas, look around your home, social media or magazine. I’m sure your creativity will begin to flow. 


Thanks for stopping by. Until next time…

Paula

Tuesday, December 3, 2024

More Christmas Cards

 Hello,

It’s really cold here so it means staying cozy inside to craft. I’ve made quite a few Christmas cards which are just sitting in a box. I am unable to mail them because of a postal strike. I guess I’ll have enough for next year. Here are a few cards I’ve made lately.


If you want to make a quick card, just add some designer series paper to some card stock and add an over sized sentiment.


Thanks for stopping by. Until next time….

Paula

🌲

Monday, November 25, 2024

A few cards

 Hello,

Here are a few cards I’ve made the past number of days.


Short and sweet today, I’m afraid. Thanks for stopping by.Until next time…

Paula

Tuesday, November 12, 2024

Christmsa Spirit

 Hello,

Are you in the Christmas mood? Have you found the Christmas spirit yet? Its eluding me. Maybe because I'm not feeling 100%. I'll get there. 🎄 In the meantime I am making cards while playing Christmas music. I've even started watchng holiday movies! 🤣

I've made these two cards recently. 

The first one uses Tim Holtz Candle Shop dies. Its a colourize die set, meaning there are several layers to get a 3D effect. I like the dimension the dies give the image. 


The second card features some Christmas puddings. Yum! I can't wait for all the holiday treats.


Thanks for stopping by. Until next time....


Paula

Thursday, October 31, 2024

Coziness

 Hello,

Do you get new jammies every Christmas? Soft, cozy ones to snuggle up by the tree or fireplace? As a kid, one of our gifts was always a pair of pyjamas. After Christmas dinner we would settle down in our new night wear and either watch tv or play with a new toy.  Now, after all the Christmas festivities are over, I like to relax on Boxing Day and stay in my jammies all day. 

When I saw these dies from Spellbinder they reminded me of all of the above! And how cute are they? 


The dies are not only for Christmas. For the slippers there are reindeer, penguins and bunnies. The dies could also be used on a get well card. The pant legs can be cut from any dsp. 


Thanks for stopping by. Until next time…

Paula

Wednesday, October 23, 2024

Sleigh

 Hello,

Does this ever happen to you? You see a die set that you fall in love with. You just have to have it. I do it all the time. Then I realize just how many fiddly bits there are. I’m telling you, I get more glue on my fingers than the small die cut pieces😂. This sleigh die set is one of those. 


I feel like I’m all thumbs when it comes to assembly. Anyhoo, I like the way the card turned out. 

Thanks for stopping by. Until next time….

Paula

Monday, October 21, 2024

Yuletide Village

 Hello,

I haven’t been feeling very creative lately. I’m going through some health issues where I find it hard to concentrate on hobbies. But, I did get a chance today to make this card. I used the Yuletide Village stamp set. It’s so adorable.


There are no dies for the stamp set so I had to fussy cut the images. Since most of the images are straight lines, it was easy. The background embossing folder is called Gently Falling. A perfect backdrop for the wintery village. 


Thanks for stopping by. Until next time…

Paula


Thursday, October 10, 2024

A little bit of this, a little bit of that

 Hello,

A mix up of stamp sets for today’s fun fold. 


I used In The Pines, Merry Moose and Evergreen Elegance stamp sets for this card. All are retired. The DSP is called Joy of Christmas. 

Open the card and, surprise, it’s a fun fold. 


For the fun fold, cut a piece of card stock measuring 8” x 4-3/4” and score at 2”, 4” and 6”. Fold accordion style. Cut the dsp to fit. This is the par I always have difficulty with, angles are not my friends. 


Adhere the piece to the inside of the card. If you are including a sentiment on the inside of the card, ensure you stamp before adhering the accordion piece. 

Thanks for stopping by. Until next time….

Paula

Tuesday, October 8, 2024

Simply Zinnias

 Hello,

I forgot to post this card I made a few days ago, using Blackberry Bliss blends to colour the Simply Zinnias stamp. I love the rich colour. 


Quick post today, sorry. Thanks for stopping by. Until next time….


Paula

Monday, September 9, 2024

Sophisticated Sled

 Hello,

Pouring rain with thunder and lightening today. That can only mean it’s a craft day😊. 

I’ve seen a few of this kind of design on Pinterest lately and decided to put my own spin on it.


The Dotted Circle 3 D embossing folder creates a snowy background for the Sophisticated Sled die cuts. The rustic looking sled is made with the Country Woods designer series paper. 
Yay all the way for wintery activities. Not that I’m wishing for snow anytime soon😂.  Let’s get through Autumn first and enjoy the cooler temperatures and changing of the leaves.

Thanks for stopping by. Until next time…
Paula


Saturday, September 7, 2024

Christmas card selection

 Hello,

Not feeling 100% so this is a quick stop. Here are a selection of cards I’ve made over the past week.


And a few tags.


Thanks for stopping by. Until next time…
Paula


Friday, August 30, 2024

Rocker Card

 Hello,

Yesterday I made a rocker card. It’s made using circle dies and just folding the die cut in half so that the card rocks back and forth. 


Although I purchased the stamp set a while ago, this is the first time I’ve inked up Christmas Barn. 


Rocker cards can be used for any occasion….birthdays, baby cards, holiday cards and much more. 
Why not give them a whirl.

Thanks for stopping by. Until next time….
Paula


Monday, August 26, 2024

More Zinnias

 Hello,

This time of year the zinnias are in full bloom. Their colours are so vibrant. They inspired me to make this card. 


The background stamp is from Tim Holtz. I thought it a little bold so I overlayed a piece of vellum to tone it down. 

Decorating the inside of a card is just as important as the front. The recipient receives that little extra surprise when they open the card. 


I’m still trying to get into the Christmas card spirit but with heat and humidity looming, it’s difficult. Stay tuned, the inspiration may hit me.


Thanks for stopping by. Until next time….

Paula


Sunday, August 18, 2024

Christmas

 Hello,

I’ve been trying to find some holiday spirit to make Christmas cards. It’s never too early to start because time is flying by and Christmas will be here before we know it.

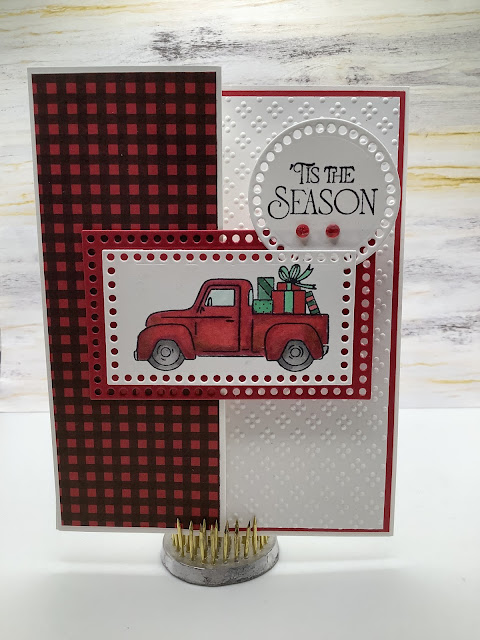
This stamp set, Trucking Along, screams Christmas to me. I think it’s the vintage looking truck. 

Here are a couple of cards I made using the stamp set.


Adorable, right? When do you start making your Christmas cards? 


Thanks for stopping by. Until next time….

Paula


Thursday, August 8, 2024

Simply Zinnias

 Hello,

Did a bit of colouring today. I find colouring very therapeutic. When I’m not feeling 100% or if it’s a rainy or snowy day, I put on some music and colour. It can be a stamped image or in a colouring book. Even as a child I liked to colour. 

Today, I started with the Simply Zinnia stamp set.  Stampin Up’s Blends make it easy to colour and blend shades together. For this card I used Peach Pie, Pumpkin Pie and Pale Papaya for the flowers and Old Olive for the leaves.


Florals are my jam. I think I do my best work when the images are flowers. Must be the gardener in me ðŸ™‚.


Here’s a card I did the previous day using the Country Flowers stamp set. 


What’s your jam? What do you like colouring best? 


Thanks for stopping by. Until next time…


Paula

Tuesday, August 6, 2024

Reverse Easel Fun Fold

 Hello,

I'm taking a break from projects around the house to sit and make a card. Today's card is an easy fun fold, a reverse easel card. 


For this card you will need:

Base- 4-1/4" x 11" card stock, scored at 2-3/4" and 5-1/2". Fold and burnish the card into a 'Z' shape.

Front layer- 3" x 4-1/2" card stock

Front second layer- 2-3/4" x 4-1/4"

DSP- smaller section of the base 2-3/4" x 4-1/4"

          -for the inside 4" x 5-1/4"

Inside piece for the sentiment- card stock 3' x 4-1/2"


Assemble the card by adhering a piece of dsp to the top part of the base. Next adhere the front panel to the base, ensuring only half of the panel is glued to the base to allow the card to flip up and create the easel.


Add the top layer to the panel and add your image and/or sentiment and embellishments. For the inside, add the dsp to the base and the inside piece for your sentiment. Add a stopper for the easel panel to sit on.  When adhering the inside piece, ensure it aligns with the front panel. 


I hope you give this fun fold a try. Thanks for stopping by.  Until next time….


Paula


Thursday, August 1, 2024

Cards

 Hello,

I’ve been remiss in posting the cards I have made in the past few weeks. My head has been all over the place dealing with an injury, immobility and the oppresive heat we are experiencing.

So, here are some cards I've made.


Hope everyone is keeping cool.

Thanks for stopping by. Until next time....


Paula

Wednesday, July 17, 2024

Rian Boot Bouquet

 Hello,

For the most part I am a Stampin Up gal. I love their coordination of products. But, every once in a while I come across a stamp or die set that I just have to purchase. This is that set…..Rain Boot Bouquet from Spellbinders. 

The flowers are just so pretty and who couldn’t love a pair of Wellies? 


While the dies are from Spellbinders, all the card stock is from Stampin Up. These dies are so versatile. I can see this card easily having a birthday, missing you or congratulations sentiment. The background embossing is a folder from Tim Holtz called Brickwork. 

Thanks for stopping by. Until next time….

Paula


Thursday, July 11, 2024

Book Fold Easel Card

 Hello,

I've been seeing some Christmas makes on the web lately. While I'm not in a holiday mood right now, I figured I'd give it a whirl. 


Today's card is a book fold easel card. A simple fun fold with a big impact. Great for the recipient to display. Thank you to Mary Deatherage for the idea.


To make the card, cut a piece of card stock for the base measuring 11" x 4-1/4" and score on the long side at 5-1/2" and 6-3/4". For the easel part, score on the base as shown below. Burnish all score lines to give a crisp fold.


Glue the section between the two score lines to the base.

For the card front, cut a piece of card stock measuring 4" x 4". Cut a piece of designer series paper measuring 3-7/8" x 3-7/8" and adhere to the card front. Depending on how you wish to decorate the front, you may want to add another layer. 


Glue the card front to the base, ensuring the front is only adhered to the bottom part of the diagonal fold. 


For the inside of the card, cut a piece of card stock measuring 3-7/8" x 3-7/8" and adhere. To make a "stopper" so the easel card will stay while folded, die cut an image or sentiment piece and adhere. 


And there you have it!

Thanks for stopping by. Until next time...

Paula