About

Friday, December 31, 2021

New Horizons

 Hello,

This designer series paper stands on it’s own. I love the soft water colour effects which lends itself to all types of cards. New Horizons dsp pairs with Misty Moonlight, BlackBerry Bliss, Bumblebee, Calypso Coral, Fresh Freesia, Soft Succulent, Polished Pink, Garden Green, Pale Papaya, Old Olive and Evening   Evergreen. With all these colour combinations, it’s easy to coordinate with SU’s card stock. 


I made this card with my friends in mind. I miss seeing them so much. It has been a while, over 4 months since we've been able to get together. We want to be safe and stay healthy. Let's hope next year will be different and we can celebrate our milestones in person.

Until next time...

Paula


Tuesday, December 28, 2021

Daffodil Afternoon Fun Fold

 Hello,

It's been a whirlwind around here this holiday season. With cooking, baking, decorating and well wishes I feel like I haven't had time to breathe. The season is done again for another year. Now it's time to get back into stamping mode. 

We've been having some good weather here with temperatures above normal. These bright, sunny days remind me of Spring....not that I am wishing time away. 

Today's card is a fun fold called an arrow card. The front flap is scored and folded to create an arrow shape. Add some DSP and you've got a card anyone would appreciate. 


Until next time.....

Paula


Tuesday, December 21, 2021

Driving By Stamp Set

 Hello,

One of the things I like best about Stampin' Up products is the coordination. Just about everything matches....ink pads, dsp, blends etc. And so many of the images in the stamp sets are interchangeable.

Here I combined the Driving By stamp set (New Mini Catalogue available Jan 4 2022) with the Biggest Wish stamp set (Annual Catalogue pg 63). 


I love the colours in the Friendly Hello DSP (SAB available Jan 4 2022). It coordinates beautifully with Fresh Freesia, Granny Apple Green, Pool Party, Petal Pink and Shaded Spruce.


Coming soon.....


The new Mini Catalogue January-June 2022  along with the Sale a-bration brochure, January 4-February 28, 2022 will be available on January 4, 2022.

Get your shopping list ready.


Until next time.....


Paula


Wednesday, December 15, 2021

Friendly Hello

 Hello,

I think I’m pretty much done making Christmas cards. On to making cards with new product. Today's card is a fun fold, a double box card. The sentiment and dsp are from the upcoming new SAB brochure. Spend $120 (CAD) from the new mini catalogue and you can select the Friendly Hello stamp set AND Designer Series Paper. The new catalogue and SAB brochure are available January 4th 2022.


This fold is an easy make. 
Base: 9 3/8" x  4 1/4" scored at 3/8", 1 3/8", 2 7/8", 3 7/8"
DSP for base: 5 1/4 x 4"
DSP for base panel: 1 1/4" x 4"

Top box: 5 1/8" x 3 1/2: score at 3/8" and 1 3/8"
DSP for Top box front: 3 1/2" x 3 1/4"
DSP for top box panel: 3/4" x 3 1/4"
White card stock for sentiment: 3 1/4" x 3"

Optional: 5 1/4" x 4" piece of white cardstock for back of card to write a personal note.


Until next time....

Paula


Sunday, December 12, 2021

Flowering Fields

 Hello,

My new favourite suite, Flowering Fields has so many different elements to make a variety of cards. But the DSP is to die for! As with most of Stampin’ Up’s Designer Series Paper, it’s double sided. The florals are magnificent and on the reverse side a more subtle pattern. 


And the colours! So pretty. Here I used Mango Melody for the card base. Bright and cheerful. 

This suite will become available on January 4, 2022. I think this may be a popular item.

Thanks for stopping by. Until next time....
Paula


Friday, December 10, 2021

Sweets & Treats Fun Fold

 Hello,

Sweets & Treats is one of my favourite stamp sets. It’s not only for Christmas but birthdays, Thanksgiving and so much more. The fun fold is called an angle fold. 


The card recipe: all measurements are in inches
Base: 11 x 8 1/2 scored at 4 1/8 and 8 1/2
DSP : 3 7/8 x 5 1/4
          2 1/4 x 5 1/4
Inside: 4 x 5 1/4
Scrap cardstock for image and die cuts  


As pictured above, the right side flap will measure 2 1/2 ". At the top of the flap, measure in 1 1/8" and make a tick mark. From that tick mark cut on an angle to the bottom of the flap. Same for the DSP. Adhere your DSP to both flaps on the front of the card.
Select your image and die cuts. Adhere to the left front flap of the card ensuring the right side can move freely to open and close. To close the card, the right flap will tuck under the die cut. 

Until next time...
Paula

Sunday, December 5, 2021

Hey Girlfriend

Hello,

 Does anyone else have the best friends in the world? I couldn’t do without mine.


This stamp set is so adorable. It’s perfect for practicing your colouring techniques. I find colouring images so relaxing.


Until next time.

Paula


Thursday, December 2, 2021

O Christmas Tree

 Hello,

It’s been a while. I used to think that when I retired my days would be leisurely. They’ve been anything but! I seem to be so busy, I don’t know when I had time to work. The days are flying by. It’s December already, 23 days until Christmas. Are you ready? Have you put up your tree yet?

I haven’t put up a Christmas tree in years. I have 2 cats, one of which would destroy the tree, thinking the decorations are his personal playthings. Instead I decorate with vignettes around the house, making sure the displays are up high where prying eyes can’t see or furry paws can't reach. 

This is Mickey. He may look cute and innocent, but he can get into lots of mischief.

This is Finnigan. He's more laid back. I think he would be ok with a tree but I don't want to chance it.

On to the card....Today’s card is all about the tree. Stampin' Up's Whimsical Trees is one of my favourite holiday bundles. I  like to mix and match different craft company’s products    (the O Christmas Tree is a Concord and 9th stamp). It’s amazing how many craft supplies compliment each other. 


Using non traditional Designer Series Paper, like Expressions in Ink, can add a different flair to your cards. This is the first time I used the Rectangle Stitched Dies. I took the largest die and used it to cut the card base. It makes a smaller card, measuring 5 x 3 1/2. 


Still plenty of room for a personal note.

Until next time…

Paula


Friday, November 26, 2021

Happy Holly-Days

 Hello,

I’m baaack! I’ve been MIA for a bit looking after some personal things plus I kind of lost my mojo.

For today’s card I’ve used the Happy Holly-Days stamp set along with a few other elements. I like mixing and matching stamp sets and dies for an altogether different feel for a card. 


Until next time….

Paula

Friday, November 19, 2021

Ever Eden Joy and Love

Hello,

This card took on many changes while making it. I had a design in mind but the card turned out totally different. Does that ever happen to you? Sometimes I think I overthink a design. Too many ideas floating around in my brain. 

Today's card uses the Ever Eden Specialty DSP. I love the gold elements in the paper. The image is from the Mistletoe Season stamp set. 


I coloured the bow with a gold gel pen. I didn't care for the way it looked so I coloured over it with a Bumble Bee Stampin' Write marker and added some Wink of Stella for some shine.

I've just about finished my Christmas cards. Now on to shopping. Yikes, only 36 days until Christmas!!!

Until next time....
Paula


Sunday, November 14, 2021

Poinsettia Petals

 Hello,

My friends and I always get together for a holiday luncheon. Last year we didn't because of  Covid but this year we have set a date. I made some pins for my friends, you can see them here. I wanted a pin for myself but in pink. I couldn't find any pink felt so I made one out of paper.  But not just any paper. I use the White Velvet paper from Stampin' Up.


I coloured the velvet paper with Blushing Bride using blending brushes. Blending brushes let you add colour in stages, whether light or dark depending on the amount of ink used. 

For this flower I cut out 2 large, one medium and 2 small poinsettias from the Pointsettia Petals dies. I stacked them off centre from each other adhering the petals with hot glue. Once I added leaves and the snowflake behind the flower,  I hot glued it to a piece of cardboard for stability. The pin is hot glued to the cardboard. The pins can be purchased at craft stores like Michael's.

I love the way this one turned out. 

Until next time....

Paula


Friday, November 12, 2021

Heart and Home

 Hello,

There is a new bundle coming out in the January-June 2021-2022 mini Catalogue. It's called Heart and Home. I used the bundle along with the DSP for today's card. Thank you to Wendy Cranford at https://www.luvinstampin.com/blog  for the inspiration. I modified the card a bit, adhering the twisty portion to a regular card base so the card would stand up. This makes the card a bit bulkier so mind the postage. 


Check out Wendy's blog for the tutorial. 

Until next time....

Paula


Monday, November 8, 2021

Felt Flowers

 Hello,

Did you know many of the Stampin Up dies will cut thin felt or fabric? For this project I used the Poinsettia Petals dies to cut felt which I made into brooches for Christmas. I adhered the petals with a hot glue gun. Thank goodness for my trusty silicone craft sheet. When I use my glue gun, glue tends to get everywhere.🤣


Any 3D project would be fun to make with the array of dies from Stampin UP. 

Here are some ideas:

Additions to place cards for any dinner party.

Pin the penguin (Penguin Builder Punch- I have not tested punches) on the iceberg for children's parties. Or possibly stamp a playful image with Stazon ink onto some felt and fussy cut.

Felt ornament decorations (Stitched Snowflake Dies, Christmas Pinecone Dies, Gingerbread Dies) Embellish with beads, gems or jewels.

Appliques on cushions. 

Wreaths (Intricate Leaves Dies, Poinsettia Petals Dies, Butterfly Brilliance Dies)

Give it a whirl.


Until nest time....

Paula


Friday, November 5, 2021

Front Flap Diamond Fold

 Hello,

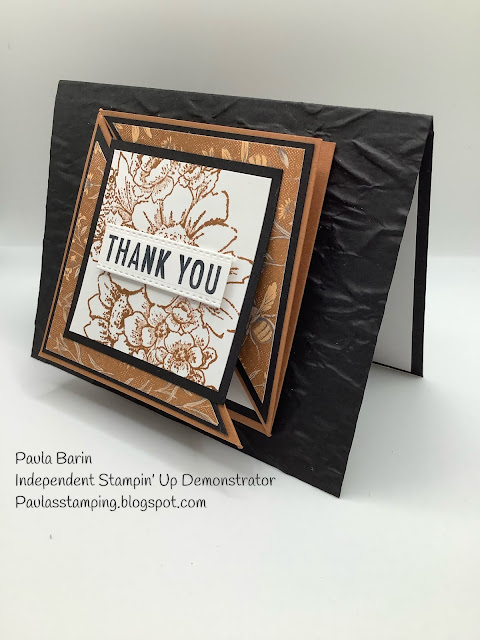
Here again today with another fun fold card. This fold is called a front flap diamond fold. Very easy to make. 


The recipe:

Base: card stock measuring 4 1/4"x 11" scored at 2 1/8" and 5 1/2" on the 11" side. 

Rotate so the 4 1/4" side is at the top of your trimmer and make a tick mark at 2 1/8". Flip it around and do the same to the opposite side.

Fold and burnish the score lines. Use a pencil to mark at 2 1/8″ at each end and cut on the diagonal to the score line. 

 Template reference:


Fold the card stock like this:


Now to decorate:

For the card front, cut a coordinating color of card stock 3 1/8″ x 4 1/8″- I used  Soft Succulent. For the card front, also cut some  DSP 2 7/8″ x 3 7/8″ – I used Painted Christmas. Adhere the DSP to the coordinating card stock and adhere to the front of the card.

Cut a Basic White layer measuring 3 1/8" x 4 1/8" for the sentiment. Adhere to the inside of the card. I used the same layering as the front of the card for the inside left panel but a piece of Basic White could also be used for a personal note.

For the diamond flip piece, cut the coordinating card stock 2 7/8″ x 2 7/8″ Adhere the square to the triangle to make the diamond shape – be careful to apply glue to only half of the square. Cut a piece of 2 3/4" DSP to adhere to the triangle square.

Use scraps to cut out a sentiment in whatever shape you choose, I used the oval Stitched Shapes. If layering the right side  triangle, cut a piece of coordinating card stock at 2 7/8" and cut on a diagonal. Cut a piece of DSP at 2 3/4" and cut on a diagonal. Adhere together and then on to the card base. 

Decorate with embellishments on the front as desired. This card folds flat and will fit into a regular envelope.


Until next time....


Paula


Thursday, November 4, 2021

Encircled in Friendship

 Hello,

Often I look to challenge myself with card making. Sometimes it's making a fun fold or using Stampin Blends to colour an image or learn a new technique. Today I challenged myself to use a stamp set that I have not inked up yet (and believe me I have many of them🤣). Encircled in Friendship is one of those stamp sets. The sentiments are thoughtful and the font is beautiful. 


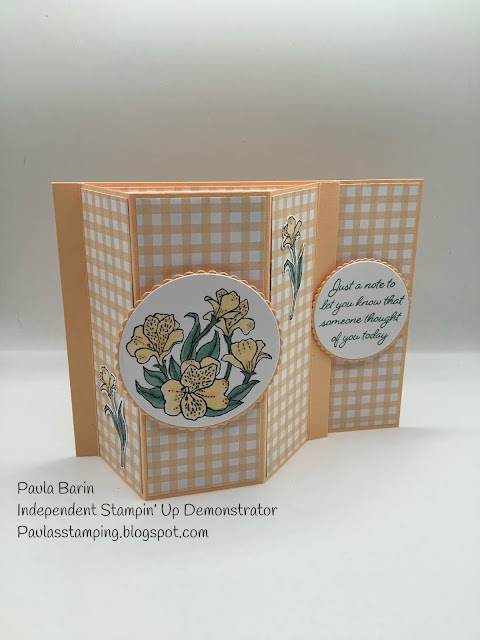
Today's card also happens to be a fun fold called a bay window card. I watched Lisa Curcio's presentation last night on how to make this card. It's very easy and can be made for any occasion. 


You can see why the fun fold is called a bay window. Alternatively, a 'window" can be cut out of the centre panel, insert a window sheet, to reveal an image on the inside. 


The "lip" of the card tucks under the sentiment which is adhered with dimensionals. 


And best of all, it lays flat for mailing

Here are the measurements for the card.

Base: 4 1/4 x 11 scored at 3/8", 1 7/8", 3 5/8", 5 1/8", 5 1/2"

FRONT: • Designer Series Paper: 1 3/8” x 4 1/8”, cut 2
 • Designer Series Paper: 1 5/8” x 4 1/8”, cut 1
 • Scraps to make your greeting and layering using any shape desired to fit the sentiment and image
  • Optional: embellishments 

 INSIDE:
 • Designer Series Paper: 4 1/8” x 5” 
• Basic White: 3” x 3 7/8” 

For instructions on assembling the card, watch Lisa's tutorial HERE and check out her other samples for inspiration.

Until next time....

Paula


Monday, November 1, 2021

Poinsettia Petals

 Can you believe its November already? Where has the time gone?

I was looking through my stash of designer series paper....and by stash I mean hoard.😊 I found the Poinsettia Place where the dies from the suite cut out the images on the paper. Yup, that'll work for this card. 


Check your stash of papers. Coordinate them with new dsp or card stock, incorporate some die cuts, add some embellishments and make them new again.

Until next time....

Paula


Saturday, October 30, 2021

3x3 Cards

 Hello on a wet Saturday! A good day to stay indoors and craft.

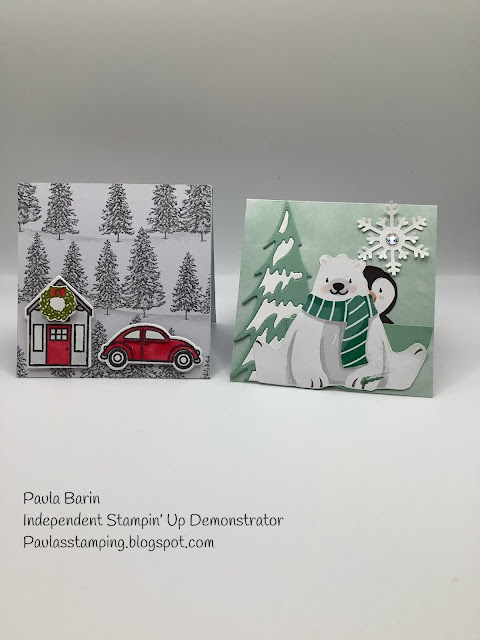
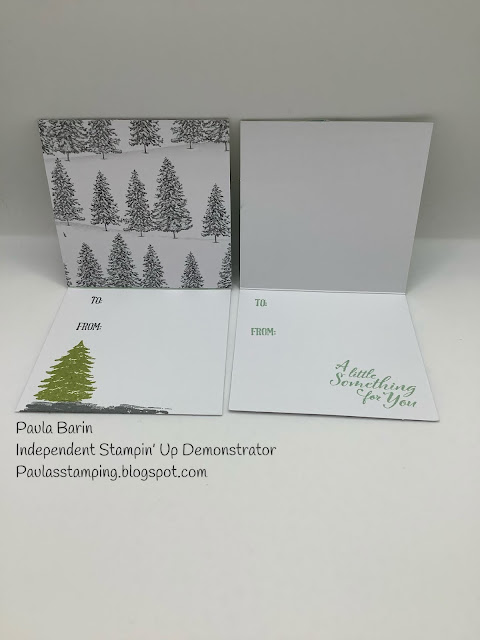
3x3 cards are a perfect way to use up scraps, whether it be off cuts or images from DSP. The little cards can be used for gift enclosures or tags on gifts. 


So don't throw away those scraps. The next time you take flowers to someone, pop in a little 3x3 enclosure or hang one on the side of a gift bag or bottle of wine. These cards whip up in no time. 

Until next time....

Paula

Wednesday, October 27, 2021

Easel Card

 Easel cards are so cute. A regular card that pops up with a secret image or sentiment.


The card folds flat in order to fit into an A2 envelope. 


The center folded flap lifts up to reveal the sentiment. Be sure to pop up your sentiment strip with Dimensionals so the flap of the easel stands up.


There is space to write a personal note inside or a piece of card stock can be adhered to the back of the card.

Here are the measurements for this card:
Base: 5 1/2" x 4 1/4"
DSP for base: 5 1/4" x 4"
Easel base: 8 1/2" x 3" scored at 4 1/4" and 2 1/8"
White card stock for inside easel: 2 3/4" x 4"
White card stock to cut a 2 1/2" circle
Sentiment strip: 1/2" x 3"
Scrap card stock for embellishments

Note: if you are colouring your image with Stampin' Blends I suggest adding another circle behind as the ink will bleed through. 

Until next time.....

Paula


Sunday, October 24, 2021

White on White with a Pop of Red

 Hello,

A simple card with a couple of layers, embossing and an image. 


Card stock: Basic White and Mossy Meadow Stampin' UP
Embossing folder: Flourished Frame Provo Craft
Image: Wonderful Autumn Studio Light
Sentiment: Christmas Gleaming Stampin' UP
Until next time....

Paula


Saturday, October 23, 2021

Treat Box

 Hi,

Stepping away from cards today with this adorable treat box I saw Sam Hammond at pootles.co.uk make. The box measures 2" x 2" x 3". I can see these boxes at the holiday table filled with chocolate treats with each person's name on the top at their place setting. So cute!


This box is quick to put together. 
Bottom: 6" x 7" piece of card stock, scored at 2" on all sides
Lid: 4" x 5 piece of DSP, scored at 1" on all sides. (adjust the score slightly  by 1/16 of an inch).

Fold and burnish all the score lines then cut on the score lines pictured here.


Mitre the corner flap to relieve some bulk.

Then add adhesive to the corner flaps. Multi Purpose Glue or Stampin Seal+ works.

Fold the corner flaps to meet the sides of the box, making sure the edges are even.

And there you have the bottom of the box. 


Repeat the same procedure for the lid. Then decorate as desired.

Give these treat boxes a try. They can be made for any occasion...birthdays...Halloween...Easter....weddings, the possibilities are endless.

Until next time....

Paula